Showing posts with label recipes. Show all posts

Monday, May 28, 2012

playing catch up...


once again, i've neglected the blog for weeks. today will be a 'catch up' post... i'll cram it with a recipe, a dude and a dog, and we'll see what else :)

k, first the recipe!
i got this recipe from one of my fave recipe blogs! the girl who writes this blog is a holistic nutritionist. not only does she give you cool recipes, she'll explain why some of the ingredients are beneficial to our health. i love it. i love her. i love the recipes.
this recipe is delish! it doesn't taste like hippy-hemp-tree hugger-granola bars. the bars aren't crunchy like you'd expect, they're soft and chewy. it totally tastes like banana nut bread. they're amazing.
pic from 'my new roots' blog

Hemp Protein Granola Bars
Ingredients:
1 1/2 cups rolled oats
3/4 cup walnuts, chopped (or any other nut)
1 cup dates, chopped (or any other dried fruit)
1 cup coconut flakes
1/2 cup hemp protein powder
1/4 cup sesame seeds (i didn't have sesame, so i used flax seeds- just cause i had them ;)
2 Tbsp. poppy seeds
2 tsp. cinnamon
1/2 tsp. salt 
3 ripe bananas
1/4 cup sunflower oil (or coconut, olive, walnut…)
2 tsp. vanilla extract
3 Tbsp. maple syrup
2 Tbsp. chia seeds
6 Tbsp. water

1. Preheat oven to 350F.
2. In a small bowl, mix the chia seeds and water together. Set aside.
3. In a large bowl combine the dry ingredients.
4. In a food processor or blender, mix bananas, oil, vanilla, and maple syrup (you can also just mash everything together with a fork). Add chia gel and pulse to mix. Pour wet ingredients over dry ingredients and stir until well combined. 
5. Spread the batter evenly into a baking pan (mine was 9" x 13"), and smooth out the top with the back of a spatula. Bake for 20-25 minutes, or until edges are golden brown. Let cool completely, store in airtight container and keep in the refrigerator for longer shelf life. You can also freeze these – take one out half an hour before you want a perfect snack!


k, now onto the next thing:
it's been ages since i've done a dudes and dogs post. AGES! i need to jump back on that.
for now, enjoy these few of pics of hugh jackman with his adorable frenchie pup...

he should live somewhere warmer so he doesn't have to wear all these layers. just sayin'... hugh, we know you've got an amazing bod under there, and it's cruel to the universe to cover it up! ;)


and what blog post of mine is complete without mentioning my fave guy on the planet?!
here's jared leto hanging in new york with his friend darren aronofsky (i wish that was my name. darren aronofsky. it rolls right off the tongue. it almost sounds like 1 long, cool word. anyway, darren is a writer, director, producer for films like 'requiem for a dream', 'the wrestler' and most recently 'black swan')
ugh! seriously. this pic does things to me. when jared dresses "normal" (which everyone knows is VERY rare) it drives me crazy, not in a bad way. he's just a normal looking dude in a baseball hat, and his beauty kills me.


Tuesday, March 27, 2012

frozen banana bites...


this is what i'm obsessed with this week-
frozen banana bites

i wanted to have some little treats in the house for when i'm having my chocolate cravings. so i came up with these little guys. they're so good. they'd be even better on a hot summer day.

2 ripe bananas (make sure they're REALLY ripe. the more freckled, the better!)
peanut butter (of course i suggest all natural pb)
1/2 bag of semi sweet chocolate chips

as i've never made these before, this was all trial and error. i lined a miniature cookie sheet (it's really small, it came with our toaster oven) with foil. i sliced the bananas, put them on the sheet and put the whole tray in the freezer. after the bananas had hardened, i tried dipping them in softened pb... that didn't work so well. so, if you're gonna make these, just dab some pb on top of the bananas - and the bananas won't have to be frozen beforehand... but you'll have to freeze them after you put the pb on them. after the bananas and pb are completely frozen, dip them in melted chocolate. i used 1/2 a bag of semi sweet chocolate chips, and had leftover melted chocolate... but i only dipped half of the banana in chocolate. if you want more chocolate, use the whole bag and submerge the entire banana bite in the chocolate. the chocolate will start to harden almost immediately because the bananas are so cold. i lined my cookie sheet with parchment paper and put the completed banana-pb-choc bites in the freezer. after they were frozen solid, i put them in a ziplock freezer bag. they're so easy, so tasty, and the perfect thing to satisfy that sweets craving. give 'em a try!


ok, so, they're not pretty. but who cares... they taste delish!


Friday, January 27, 2012

day 22 of 365...


ok, let's be real. i can't keep up with the 'pic a day' project. this will be my last 'day xx of 365' post. i'll still post pics, but i don't like the pressure of HAVING to post 1 every day.

the past few days i've tried some new recipes i found online. oh my lord, they are both SO good! so, so, so good! too good to not share with you.

recipe 1:


since her blog has WAY better pics than i could take, i'll let you get the recipe from her. i stumbled on the recipe a few mornings ago and realized i had all but 2 of the ingredients on hand. WIN! i made the salad for lunch that day (minus the edamame and green cabbage) and it was soooo good. she suggests buying pre-made slaw mix and shredded carrots. i don't agree at all! definitely buy red and green cabbage and shred it yourself. then grate some carrots in a food processor. if you don't have a processor, just use a cheese grater. i find that prepared veggies from the store are always dried out, and flavorless. also, she suggests using 2 green onions, i used 3 and i actually would've preferred more! so add extra, if you are a fan of 'em! anyway, i made the salad 2 days ago, and had some leftovers again today and it's still super good. i can't wait to make this again!!!!
here is my picture of the salad, obviously a lot different looking than her salad... but still delicious :)


recipe 2:


this is what we had for dinner tonight. yum-o!!! about halfway through the meal, hubs is cramming forkfuls of food into his mouth and he was able to mutter "this is a TEN!". yay!!! even without meat, he loved it! it's such a good recipe. great for vegetarians, vegans (if you leave out the cheese), and gluten-free people. i left the cheese out of mine, but sprinkled a little bit of cheese on the hubs' peppers. the recipe takes a looong time to prepare/cook, but the result is worth it. i was glad i read through a lot of the reviews before hand. somebody suggested giving yourself 2 hours from beginning to end. she was right. some other people said it's a long process but worth it because the peppers freeze/reheat nicely. that's what sold me! the recipe says the filling will fill 4 peppers, the reviewers said it fills WAY more, and again, they were right! (don't you love recipe reviewers? they do all the hard work for you. i always read the reviews before i try something new). i bought 6 good sized peppers, and still had leftover filling. next time i'll use 8 peppers (LOTSA leftovers for when i'm lazy!). i baked mine, let them cool, then individually wrapped them (in plastic wrap and foil) then put them all in a labeled ziplock baggie in the freezer. when i don't feel like cooking dinner next week, i'll defrost 1 in the fridge and bake it in the oven. simple!
this is my pic of the filling as it's cooking.
i added corn. the recipe doesn't call for it, but it was good :)

make 1 of these next week. you won't be sorry!

Friday, January 13, 2012

day 9 of 365...


drink up, baby!
yep, i'm telling you to drink apple cider vinegar. it supposedly has a ton of health benefits. webmd and a bunch of other sites said so ;) a couple of years ago my moms friend suggested it for weight loss. i thought it sounded crazy, but bought some and tried it. i don't know if it helped me lose weight. anyway, it's supposed to help if you have a sore throat, sinus problems, acne, acid reflux and loads of other ailments. so, are you willing to try it? you can start out with 1-2 teaspoons diluted in a cup of water. i don't like the idea of sipping vinegar water, so i make a more concentrated version, using only about 1/2 cup of water. make sure you don't drink it straight though, cause the acid will mess up your teeth and mouth over time. anywho, if you add honey to your water/vinegar mixture, you won't even notice the vinegar taste. ok, that's a lie, but seriously the taste isn't bad at all (or maybe i've just gotten used to it).

Tuesday, January 10, 2012

day 6 of 365...


the beginning stages of ratatouille...
... mmmm! so colorful & so good! :)

i shared the recipe last year. you can find it here.
(if you're wondering what the yellow stuff is, it's yellow squash... henry's market was out of zucchini.)

can't wait for dinner tonight!!!!!!

Tuesday, December 13, 2011

noodles...


another win for pinterest!
after finding the great veggie burger recipe on pinterest last week, i thought i'd try another new one. i saw a recipe for vegetarian lo mein that caught my eye. i forgot to 'pin' it, but luckily bookmarked the blog that it came from. i've NEVER been a fan of chinese food. EVER! it's always too salty, and well... just gross to me. i don't know why i decided to try this lo mein, but i'm glad i did! hubs even ate some! he had planned on making himself a burger for dinner, but i made him take 1 bite of the veggie lo mein, just to get an honest opinion. he loved it, and decided he'd have a burger another night. i was thrilled :)


Serves 4
Salt
8 ounces each: broccoli crowns, cut into small florets, and sliced mushrooms
1/2 box (8 ounces) spaghetti
7 to 8 ounces drained extra-firm tofu (1/2 package), cut into bite-size chunks
1 tablespoon low-sodium soy sauce
1 recipe Lo Mein Sauce (see below)
2 tablespoons vegetable oil
1 medium-large onion, halved from pole to pole, each half cut into sixths
1 tablespoon each: fresh garlic and ginger
Bring 2 quarts of water and a generous sprinkling of salt to boil in large pot. Add broccoli; cook until crisp-tender, about 2 minutes. Transfer to a plate with a slotted spoon. Add spaghetti, cook, stirring frequently, until just tender; drain and set aside.
Toss tofu with soy. 
Mix Lo Mein Sauce.
Meanwhile, turn on vent fan and heat a 12-inch nonstick skillet over high heat until very hot. Add 1 tablespoon of oil and the onion; stir-fry until crisp and spotty brown, about 1 minute. Add mushrooms; stir-fry until just cooked, about 2 minutes. Add tofu; stir-fry until lightly browned, about 1 minute longer. Add broccoli; cook until heated through, about 1 minute. Add garlic and ginger; stir-fry until fragrant, about 30 seconds. Transfer to a plate and add remaining 1 tablespoon of oil to the empty skillet; heat until shimmering. Add spaghetti; stir-fry until heated through, about 2 minutes. Return meat/vegetable mixture to pan, along with Lo Mein sauce; stir-fry to combine. Serve immediately.
Lo Mein Sauce
Mix 1/4 cup each low-sodium vegetable broth and low-sodium soy sauce, 2 teaspoons each rice vinegar and toasted sesame oil, and 1 teaspoon each hot red pepper flakes and sugar.

(i left out the red pepper flakes. and since i don't have a kitchen scale (gasp! i know!!!) i just guessed on how much broccoli i was supposed to put in. next time i'll definitely add more. 8 oz doesn't seem like a lot, and however much i put in, definitely wasn't enough for me! i might add some other veggies next time too. you can never have too many, right?!)
so there it is. try it. maybe you'll be surprised, like i was! 

Saturday, December 10, 2011

thanks, pinterest...


yes, i'm only just now jumping on the pinterest bandwagon. i'm already majorly addicted. with 13 boards and 150+ pins, i'd say i'm an official pinner now. are you on pinterest yet? if not, close this tab immediately, and go to pinterest. 
i've pinned all kinds of crap. funny photos, photos of hot guys. diy craft stuff, decorating ideas. the list goes on. anywho, i recently found this great recipe for veggie burgers. i've eaten store bought veggie burgers and they were soooooo foul tasting. (yeah, b*ca b*rger, i'm talking to you!!!!). i found a recipe online for veggie burgers last year, and made 'em. disgusting. sooo, when i saw this recipe on pinterest i was hesitant to TRY the veggie burger deal again. but i love everything that the recipe calls for, so how bad could they be, right?! i'm sooo glad i decided to forget my past horrible experiences and try again. these are sooooooo good! please make them.

here is the original link - it's kind of a long, drawn out post. 

here is the recipe:
Sweet Tater Black Bean Burgers [yields 8 burgers – vegan, gf]
  • 15oz black beans, drained + rinsed
  • 3c cubed sweet tater, cooked + skin on [~1.5lbs]
  • 1/2c frozen or fresh corn
  • 2/3c finely chopped onion [1/2 medium onion]
  • 2 large garlic cloves, finely minced
  • 1/2c cooked quinoa
  • 6T rolled oats, partially ground
  • 2T sunflower seeds
  • 1/2t salt
  • black pepper
  • 1t cumin
  • 1t oregano
  • 1/4t coriander
  • 1t chili powder
  • 1/4t cayenne [optional]
  • 1T olive oil
  1. Preheat your oven to 375* once you finish cooking the quinoa + potato.
  2. Mash half of the beans in a bowl until paste-like.
  3. Add in the rest of the beans and give a very light stir/mash to combine.
  4. In a large bowl, mash the sweet tater.  Each cube should be mashed, but you don’t want it creamy.
  5. Stir in the salt, pepper, oregano, coriander, chili powder, cayenne [if using] and olive oil, until combined.
  6. Mix in the onion, garlic, corn, black beans, quinoa, sunflower seeds, and ground oats, until just combined.
  7. Taste, and adjust seasonings to your liking.
  8. Form into balls, between your hands and flatten into 1/2”-3/4” thick patties.  This should make 8 medium/large patties.
  9. Place on a pan lined with parchment paper [or lightly greased pan] and bake on each side for 15min, flipping once, half-way through.
  10. Remove from oven + serve! 


i cooked the 8 patties, had 1 for dinner and froze the other 7 - i waited til they were completely cooled, then individually wrapped them in saran wrap, covered in foil, then put in a large ziplock freezer bag. the next night i wanted another veggie burger (no surprise there), so i defrosted one in the microwave and sauteed it in olive oil (just a few minutes on each side). OMG, they're even better the second night. sauteing them forms a crunchy-ish crust on the outside. it's sooooo dang good. i would've rather defrosted it in the fridge, but it was a last minute decision to have one. now that i'm talking about them, i kinda want one. :)~ yum. make 'em and let me know whatcha think!!!!!!


Tuesday, November 15, 2011

ch-ch-ch-chia...


i'm sure you ALL remember chia pets, and their horribly catchy theme song.


i never would've guessed that years and years later i'd be eating the same sticky seeds that created the fur/sprouts on my chia cat. have you had chia seeds before? i was reading about them and their amazing health benefits, and had to try them for myself. these tiny seeds are packed with omega-3's, antioxidants, iron, fiber and soooo much more. they're amazing! click HERE to read more about chia seeds and their benefits. if you're thinking "ewww, how am i gonna eat those?"... well lucky for you, you can sneak them into anything! they have little to no flavor at all. you can eat them straight out of the bag, sprinkle them on a salad, or put them in your smoothies, oatmeal, yogurt, seriously anything!!! my bag of chia seeds has 2 recipes on the back, 1 is for a lemon cake that sounds super good. another way to eat them is to make chia gel or chia pudding. the seeds absorb 10 times their weight in water, making a tapioca-kind of-consistency-gel-stuff (clearly, i'm not a professional food blogger, ha!). you can make the gel with water or nut milk. i've seen recipes where people use the chia gel as an egg substitute while baking cookies, brownies, etc.!!! i'll have to try that.

this 1lb. bag of chia seeds is around $7-$8 at henry's market. it might sound like a lot, but you use such a small amount of seeds each time, so this bag will last quite awhile.

here are some of the ways i used chia seeds this past week:

chocolate cinnamon chia seed pudding
1 1/2 cups almond milk
1/2 cup chia seeds
2 tbsp. agave 
2 tsp. cocoa powder
1/2 tsp. ground cinnamon
1/2 tsp. vanilla
pinch of sea salt

i mix the milk and cocoa powder together first, then add the rest of the ingredients. let it sit at room temperature (uncovered) for 20 minutes. after 20 minutes it will be super thick and gel-y. the longer you let it sit, the more gel-y it will get. refrigerate unused portions. after it's thickened you can also pop it in the freezer and it will harden up to a nice frozen treat - kind of like ice cream, but different, and wayyyyy healthier!
the pudding right after i've mixed it up.

after a few minutes, the seeds are starting to 'pop'

almost 20 minutes later and the seeds have all popped
and have formed their tapioca-like gel

i also added the seeds into some pancake batter this weekend! you'd never know they were in there :)
 hubs: "what are you making?"
me: "banana pancakes with chia seeds"
hubs: "CHEESE SEEDS???????? WHATTTTT????"
haha, poor guy. by the way, the pancakes were delicious!


why stop at pancakes?! i put about 1 tsp of seeds into the egg mixture for some french toast!

you can see where some of the seeds gathered on the french toast.

ps. i used whole grain bread for my french toast, that's why it doesn't look ANYTHING like restaurant style french toast. it's sooo much better with whole grain bread. nutty, great texture, delish and better for you anyway :)

so, see, even if you don't eat healthy meals all of the time, you can still add chia seeds to your 'cheat' meals, and maybe feel a little less guilty about it ;)
there are a TON of recipes online that incorporate chia seeds... but experiment on your own. add them to things you're already planning on making. and let me know whatcha think!!!!


Tuesday, November 8, 2011

the taste of fall...


fall is my favorite season for baking. cooler nights with warm treats filled with pumpkin, cinnamon, cloves & nutmeg is the perfect combination. i LOVE pumpkin treats sooo much. i tell myself what i'm eating is healthy because pumpkin is really good for you ;) pumpkin is full of vitamin A, antioxidants, and fiber! i have a ton of 'fall' recipes, here's a few of my favorites.

pumpkin pancakes 
(thank you martha stewart)

1 1/4 cups flour
2 tablespoons sugar
2 teaspoons baking powder
1/2 teaspoon each: cinnamon, ground ginger, & salt
1/8 teaspoon nutmeg
pinch of ground cloves
1 cup milk
6 tablespoons canned pumpkin puree
2 tablespoons melted butter
1 egg

whisk dry ingredients. in a separate bowl combine dry ingredients. fold wet ingredients into dry ingredients. melt some butter on a griddle and pour 1/4 cup of batter for each pancake. cook pancakes about 3 minutes per side.
*i ALWAYS add extra pumpkin. because i love the flavor of pumpkin. if you're in a pinch and don't have all of the spices, i've used pumpkin pie spice and it turns out great! and who doesn't have pumpkin pie spice on hand?! i always have some leftover from thanksgiving or christmas. use 1 to 1 1/2 teaspoons of pumpkin pie spice to replace the cinnamon, ginger and cloves.*


spiced pumpkin bread
the recipe makes 2 loaves, so you can freeze one if you want & save it for later :) or give it away to a friend

3 cups all purpose flour
2 cups sugar
2 teaspoons baking soda
1 teaspoon baking powder
1 teaspoon cinnamon
1/2 teaspoon salt
1/4 teaspoon ground cloves
1/4 teaspoon ground nutmeg
2/3 cup canola oil
3 eggs, lightly beaten
1 (15 oz) can pumpkin
1/2 cup raisins
cooking spray

1. preheat oven to 350º
2. combine flour & next 7 ingredients (through nutmeg) in a large bowl. make a well center of mixture. combine canola oil, eggs and pumpkin in a medium bowl; stir with a whisk until smooth. add to flour mixture, stirring just until moist. fold in raisins.
3. spoon batter into 2 (9 x 5 inch) loaf pans coated with cooking spray. bake at 350 for 1 hour or until wooden toothpick inserted in center comes out clean. cool loaves in pans 10 minutes on a wire rack. remove from pans. cool loaves completely. 


Chocolate Chip Pumpkin Bars

2 cups all purpose flour
1 tablespoon pumpkin pie spice
1 teaspoon baking soda
3/4 teaspoon salt
1 cup (2 sticks) unsalted butter, room temperature
1 1/4 cup sugar
1 large egg
2 teaspoons vanilla
1 cup pumpkin
1 package (12 oz) semi-sweet choc. chips

Preheat oven to 350º. Line bottom and sides of a 9 x 13" square baking pan with foil, leaving an over hang on all sides. In a medium bowl, whisk together flour, pie spice, soda and salt; set aside. With electric mixer, cream butter and sugar on med-high speed until smooth. Beat in egg and vanilla til combined. Beat in pumpkin. Reduce speed to low and mix in dry ingredients until just combined. Fold in choc. chips. 
Spread batter evenly in prepared pan. Bake til edges begin to pull away and toothpick comes out with just a few crumbs, about 35-40 minutes. Cool completely in pan.
Lift cake from pan (using foil as an aid). Peel off foil and use a serrated knife to cut into 24 squares.
*if you don't have pumpkin pie spice, here's a substitute: 1 1/2 teaspoons cinnamon, 3/4 teaspoon ground  ginger, 1/2 teaspoon ground nutmeg, 1/8 teaspoon allspice, and 1/8 teaspoon cloves*


yummmmmmmmm!!!!!! you need to bake at least 1 of these treats this season!
you won't regret it, i promise!

Thursday, October 27, 2011

dear quinoa, i love you...


it's true. i LOVE quinoa. 
if you're not familiar with quinoa (pronounced keen-wah), you need to get familiar, real quick! it's been called the "most perfect non-animal sources of protein on the planet". What makes it unique is that it is the only plant based source of complete protein. "Complete" means that it contains all 9 of the essential amino acids that are crucial to human function and health.
-an excellent source of magnesium. 1 serving of quinoa can meet 48% of the daily value that we need.
-rich in protein, calcium and iron, which makes it a great meat substitute for vegans.
-gluten free, which makes it a great alternative to grains for people with gluten sensitivity.
when i first made quinoa, i did a recipe i found online. the preparation and cooking method was ridiculous. soak it for a long time, rinse it, boil it, blah, blah, blah (somewhere in there it required i do something with cheesecloth. huh, cheesecloth?!?! uhh, i'm fresh out of cheesecloth. sorry.) after looking at more recipes and reviews online i found out that most people cook it the same way you'd cook rice. 1 part quinoa, 2 parts liquid. bring to a boil, cover, reduce heat to simmer, let it simmer for about 15 minutes or til tender. strain in a fine-mesh-strainer-thingy. simple, done!
here are a couple of recipes i LOVE:

Black Bean & Tomato Quinoa

  • 2 teaspoons grated lime zest

  • 2 tablespoons fresh lime juice

  • 2 tablespoons unsalted butter, melted and cooled

  • 1 tablespoon vegetable oil

  • 1 teaspoon sugar

  • 1 cup quinoa

  • 1 (14- to 15-ounce) can black beans, rinsed and drained

  • 2 medium tomatoes, diced

  • 4 scallions, chopped

  • 1/4 cup chopped fresh cilantro


  • Whisk together lime zest and juice, butter, oil, sugar, 1/2 teaspoon salt, and 1/4teaspoon pepper in a large bowl.
    Cook quinoa in a medium pot of boiling salted water (1 tablespoon salt for 2 quarts water). use my directions above, or follow the package directions on the quinoa box. 
    Add quinoa to dressing and toss until dressing is absorbed, then stir in remaining ingredients and salt and pepper to taste.


    Grilled Halibut with Orange Cilantro Marinade over Citrus Quinoa


    2 ½ tbsp. Orange Juice

    2 tbsp. walnut oil
    1 ½ tbsp. fresh squeezed lemon juice
    1 tsp. kosher salt
    1 lb. halibut fillet
    1 cup quinoa
    2 cups Orange Juice
    1 tbsp. snipped fresh cilantro, divided
    In zipper closure food storage bag, combine first 4 ingredients; add halibut, turning to coat with marinade. Refrigerate 30 min. Cook quinoa in 2 cups orange juice following pkg. directions.
    Preheat grill to high; grill halibut, skin-side-down, on grill rack until interior of fish turns opaque (10 min. per inch of thickness measured at the thickest part.)

    serve with quinoa and sprinkled with cilantro.
    *it's sooooooo good! i didn't have walnut oil, so i just used vegetable oil)*


    you can buy small boxes of quinoa at the grocery store...

    but if you're like us, you'll fall in love with quinoa & you'll need to have 'backstock' of it in the cupboard. we now buy it from the bulk bins at Henry's Market and keep it in food storage containers in the cupboard. 

    now i'm hungry.

    Sunday, October 16, 2011

    juice-head (not related to anything from jersey shore)...


    i've recently become obsessed with juicing!
    i eat pretty healthy (MOST of the time!), but i really don't eat enough veggies. it's not that i don't like them, i think i'm just lazy. i like broccoli, cauliflower, bell peppers. LOVE asparagus... but that's about all i eat. even though i love squash, i rarely make it. i don't think i've ever made spinach, EVER (except when it's in the veggie lasagna i make). i needed a way to get all the great nutrients from things like spinach, without cooking and/or eating it :) haha.
    enter jack lalanne power juicer!!
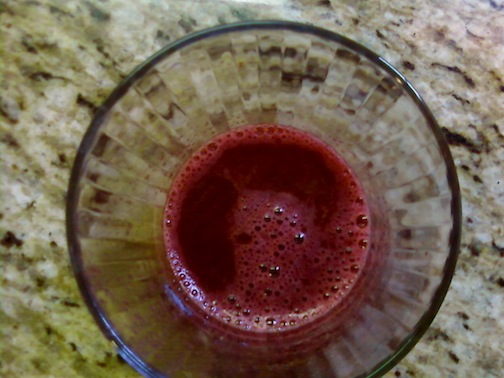
    it's a few years old, but it's gotten more of a workout the past couple months than it has the past few years combined. surprisingly the juices don't taste too bad either. some take awhile to get used to, but if you just chug 'em you're fine. (random thought... they should make a tiny beer-bong-like contraption made specifically for veggie juice). i do appreciate the juice though. i remind myself what i'm putting into my body and how it will benefit me. i also remind myself how much more horrible it would be if i had to EAT all of the veggies i've just drank! ugh! here are some recipes i've tried:

    the great eight:
    3 carrots, 1/2 potato, 3 broccoli florettes, 1/2 beet, 1/4 red bell pepper, 1 tomato, 1/2 cucumber.
    "This impressive vegetable juice drink is a great all round tonic. It is good for strengthening the blood, cancer prevention, promoting healthy skin, boosting the immune system and a whole lot more!"

    1/2 potato, RAW? ewww, right?! 1/2 beet?! i've never eaten a beet in my whole life!
    this is NOT my favorite recipe, but i did drink the entire thing. i felt like it tasted a bit like dirt. i think it was the raw broccoli and beet.

    alkaline juice:
    1 cup spinach, 1/2 cucumber, 2 stalks celery including leaves, 3 carrots, 1/2 apple.
    "Juicing Tip: Juice cucumbers with their skins on. The dark green skin is a great source of chlorophyll, a phytochemical that can help build red blood cells. Cucumbers also contain silica, a mineral that is good for the skin. Make sure to wash them before making cucumber homemade juice recipes"
    i actually really enjoyed this juice! 


    there are a lot of websites with tons and tons of juice recipes. i've started combining what i love and making my own recipes. other than the 1st recipe i posted, i've had spinach in EVERY juice i've made. i love spinach and carrots mixed!!!! that's my 'go-to' juice that i've made the most often. you can also add cucumber (sooooo good, and smells soooooo good!) or add an apple. or just go plain spinach and carrot. try it! trust me!

    i love the colors you see come from the juicer too. such bright, natural beauty - dark green, bright orange, deep beet red, etc.
    green goodness! pure spinach juice.

    here comes the carrots!

    my favorite part of cleanup. the beautiful 'veggie confetti' ;)
    seriously i took a pic of it the 1st time and sent it to henry.
     clean-up tip! put a plastic produce bag inside of the pulp container. 1 less dish to wash! :)
    i came up with that myself.

    2 cups of 'alkaline juice'!

    the 'great eight juice'. so pretty, huh?!


    do you juice? do you have any recipes you'd like to share?

    Wednesday, June 8, 2011

    hungry???...


    do you have a crock pot? if not, you need to get one. if you have one, you need to make this tomorrow! it's a super easy, super yummy ratatouille! ready?

    2 large onions, cut in half and sliced
    1 large eggplant, sliced, cut in 2 inch pieces
    4 small zucchini, sliced
    2 large garlic cloves, minced
    2 large green bell peppers, de-seeded and cut into thin strips
    2 large tomatos, cut in 1/2 inch wedges
    1 (6 oz) can of tomato paste
    1 tsp. dried basil
    1/2 tsp. dried oregano
    1 tsp. sugar
    2 tsp. salt
    1/2 tsp. black pepper
    2 Tbs. fresh parsley, chopped
    1/4 c. olive oil
    red pepper flakes, to spice it up (optional)

    1. layer half of the veggies in large crock pot in the following order: onion, eggplant, zucchini, garlic, green peppers, tomatoes.
    2. sprinkle half of the basil, oregano, sugar, parsley & s/p on the veggies.
    3. dot with half the tomato paste
    4. repeat layering process with remaining veggies, spices and tomato paste.
    5. drizzle with olive oil.
    6. cover and cook on low for 7 to 9 hours
    7. place in serving bowl and sprinkle with grated parmesan cheese
    8. refrigerate to store
    9. may freeze up to 6 weeks.

    *note: i don't add the salt when cooking. i usually salt each serving before i eat it. i don't like things too salty. also, last time i made it, i realized i didn't have enough dried basil & oregano, so i replaced it with dried italian herbs. it was fine. still delish.*
    it's good over rice, or noodles, or with a chicken breast... or just plain! it's sooooo good. when i make a pot of it, we eat it for a few days until it's gone. you can also take some leftovers and blend them in a blender to make your own pasta sauce. how easy is that? layering a bunch of veggies in a pot and letting the crock pot do all the work? and how easy is it to reheat leftovers the next night? 
    simple and delicious! AND healthy!!!!!

    i don't have a pic of the ratatouille, so i'll put a pic of THIS ratatouille. ;)

    Wednesday, May 11, 2011

    yummus...

    yummy + hummus = yummus

    i've tried hummus before, but wasn't crazy about it. recently my friend, katrina, mentioned (on facebook) that she made some delicious homemade roasted red pepper hummus. i instantly craved it. i dunno what the deal is with me lately, but i've been craving foods that i've previously not liked. (first it was avocados, now hummus. what's next?!). so strange. i asked for the recipe, and made the hummus tonight. it's soooooooo good. i bought pita chips to dip in it, and now i'm in love with pita chips too. they're so crunchy and salty. delicious. i feel it's my duty to share the recipe with you too.

    2 cans of garbanzo beans, drained
    1 small jar of roasted red peppers, NOT drained
    3 whole garlic cloves, peeled
    1/4 cup of olive oil
    red pepper/cayenne to taste
    salt to taste
    juice of 1 lemon

    blend it in a food processor til creamy.


    so easy, huh?!?! i left out the pepper and salt. i was going to salt it afterwards, but since i was eating it with pita chips, they were salty enough. if you're gonna dip carrots or other veggies in it, i'd add salt & pepper.


    these are the pita chips i bought.
    this could turn into a dangerously addictive snack.


    THANKS KAT for sharing your recipe!
    ps. years ago hubs and i went to katrina's house (before we were even married) and she had made some super yummy soup. she shared the recipe with me, and i still love it. when she gave me the recipe it consisted of measurements such as 'enough to make it thick', 'as much as you want', etc. i love recipes that aren't precise and you can play around with. i don't know what the soup is called, but in our house it's only referred to as 'trina soup'. she has all the great recipes.

    Thursday, March 3, 2011

    good ol' comfort food...

    don't have plans for dinner yet?! how about delicious chicken pot pie? yum, right?! 
    i've tried chicken pot pie before, but never liked it. i didn't understand how/why people could eat it. towards the end of last year (2010) i found this recipe online and thought i'd try it. in my experience, homemade things taste wayyyy better than store bought. i looked at the ingredients and there wasn't anything i didn't like, so how could i not like chicken pot pie? i made it, tasted it, loved it, DEVOURED it!  it's sooooo good. so so so so good.
    it makes 1 large pot pie, rather than individual pies. i have small ramekin's so i've made this recipe both ways. it tastes the same either way, but obviously if you use individual ramekin's you get more crust :)


    Ingredients


    1 pound skinless, boneless chicken breast halves - cubed

    • 1 cup sliced carrots
    • 1 cup frozen green peas
    • 1/2 cup sliced celery
    • 1/3 cup butter
    • 1/3 cup chopped onion
    • 1/3 cup all-purpose flour
    • 1/2 teaspoon salt
    • 1/4 teaspoon black pepper
    • 1/4 teaspoon celery seed
    • 1 3/4 cups chicken broth
    • 2/3 cup milk
    •  
    • 2 (9 inch) unbaked pie crusts

    Directions

    1. Preheat oven to 425 degrees F (220 degrees C.)
    2. In a saucepan, combine chicken, carrots, peas, and celery. Add water to cover and boil for 15 minutes. Remove from heat, drain and set aside.
    3. In the saucepan over medium heat, cook onions in butter until soft and translucent. Stir in flour, salt, pepper, and celery seed. Slowly stir in chicken broth and milk. Simmer over medium-low heat until thick. Remove from heat and set aside.
    4. Place the chicken mixture in bottom pie crust. Pour hot liquid mixture over. Cover with top crust, seal edges, and cut away excess dough. Make several small slits in the top to allow steam to escape.
    5. Bake in the preheated oven for 30 to 35 minutes, or until pastry is golden brown and filling is bubbly. Cool for 10 minutes before serving.


    i changed the recipe a little bit. 
    --instead of using 1 cup of peas, i used 1/2 peas, 1/2 corn. i love corn.
    --i also baked the 'bottom' crust for about 10 minutes before i poured in the filling. that way it isn't soggy at all.
    --since you have to cook the chicken in water then drain it off... i figured why not cook the chicken in the broth that you'll have to use, then just drain it and save the broth for later in the recipe. 
    --the first time i made it, i didn't have celery seed on hand, and didn't want to miss out on any extra flavors, so i looked in the pantry and found poultry seasoning... sure that'll work for now. haha. it was delish. i still haven't tried it with the celery seed, i've just used poultry seasoning ever since. 
    --some of the reviews for the recipe said it was too dry and there wasn't enough of the liquid filling. if you make extra filling that will be helpful... then when you're pouring it in, just pour it to the top, and jiggle the pan so the liquid goes to the bottom, then pour on some more.

    so dang good.